What is VIA?
VIA (Virtual Keyboard Interface) is an open-source keyboard configuration tool that allows users to customize their keyboard's key layout, lighting effects, and other features.
VIA's main goal is to provide a simple and user-friendly interface that allows for easy configuration and personalization of mechanical keyboards.
VIA supports various keyboard layouts and brands and can be used directly through the browser without the need for software installation.
How do you get VIA?
There are two ways to use VIA:
Web app: https://usevia.app/
Because it's automatically updated with new features and doesn't require manual updates, the web app is the best choice. Unfortunately, it only works with Chrome-based browsers that support WebHID.
Desktop program: https://github.com/the-via/releases/releases
The desktop application, which serves as a wrapper for the web version, requires an internet connection. It can provide more reliable keyboard recognition. Visit the VIA Releases page to download the VIA Configurator. The software is compatible with Linux, macOS, and Windows.
How do I connect to VIA?
Make sure your keyboard supports VIA and connect it with a cable. Then you can open the VIA web app or VIA desktop program.
1. Download the JSON file for your keyboard.
Some keymap JSON files may not be recognized immediately because Github needs time to review our VIA code.
You can usually download the JSON file from the product detail page or find the JSON file for other Akko-VIA keyboards on the Download Center page. For example, you can download the JSON file for the MonsGeek M1 V5 directly from the product detail page.

2. Click on "SETTINGS" and activate the option "Show Design Tab".
If four buttons are already visible above, you can click directly on the "DESIGN" button and skip this step.

3. Click on "DESIGN" and import your keyboard's JSON file.
"Design" -> "Confirm" -> "Load" -> .

>Click on ''Load''


4. Click "CONFIGURE" to see that VIA has recognized the keyboard.

In the top left corner of the page you will find several layers , each of which can be assigned different keys.
The top half of the page shows the active key layout , while the bottom half offers various customizable functions.
How do I remap keys in VIA?
On the "Configure" tab, click on "KEYMAP." There you'll find various sections: BASIC / MEDIA / MACRO / LAYERS / SPECIAL / LIGHTING / CUSTOM .
-
Basic: Here you can assign standard keys such as letters, numbers, and special characters, such as A, B, Enter, or Shift.
-
Media: Allows you to assign media keys for mute, play/pause, track skip, and volume control.
-
Macro: Allows you to create macros where a key performs a sequence of keystrokes or actions – ideal for automation.
-
Layers: Allows control of multiple layers, so that a key can have different functions depending on the layer (e.g. pressing the Fn key).
-
Special: Contains special functions such as reset (for flashing the firmware) or software-specific keystrokes.
-
Lighting: Here you can adjust RGB lighting, such as brightness, color modes, or lighting effects.
-
Custom: Allows you to create and assign custom keyboard functions or scripts that do not fall under the other categories.
Example: Change ESC key to A
Click the ESC key (it will start blinking slowly) and then click A in the BASIC area. VIA will now convert the ESC key to an A key.

How do you create a macro in VIA?
The MACRO section in VIA is used to automate repetitive tasks or execute complex commands with just one keystroke.
-
Automate text entry: If you often type the same phrases, addresses, or signatures, you can create a macro to insert them with a single keystroke.
-
Gaming Shortcuts: Create a macro for complex key combinations, item switching, or quick commands to improve your reaction time.
-
Task automation: Macros can also be used for software shortcuts or multi-step processes, such as automatically filling out forms or launching specific programs.
Creating a custom keyboard shortcut macro
1. Go to the "Configure" tab and select "MACROS".

2. Click on "FULLSCREEN".

3. Click on "RECORD KEYSTROKES".
Press the key you want to record and then click the button to stop recording.

4. Click the "SAVE CHANGES" button.
The macro is now recorded successfully.

Create a macro that outputs long text strings
1. Go to "MACROS" on the Configure tab.
2. Click on the symbol with the angle brackets (<>).

3. Enter the text you want to output and then click "Save".

4. After the macro has been successfully created, click "KEYMAP" → "MACRO" .

5. Similar to remapping keys, you can now assign the desired key to the macro you created.

How to use different layers in VIA?
Layers in VIA allow you to assign different functions to the same keys. If you have a compact keyboard, you can use different layers to achieve the desired functions. You can also easily switch between tasks or profiles without needing multiple keyboards.
For example, Layer 2 could be used for gaming shortcuts or media controls, while Layer 1 is your typical typing layout.
How we use layers:
1. Select Layer 1 and click "KEYMAP" → "LAYERS".
Here you can set FN to MO(2) to enable Layer 2.
- MO(2) = Layer 2
- MO(3) = Layer 3

2. Select Layer 2 and remap the key.
Here you can reassign each key to functions like volume up, volume down, play/pause, and track skip. For example, I set the ESC key to volume down .

Terms in the Layers area of VIA
To use multiple layers effectively, you'll need to assign keys that allow you to toggle or temporarily activate different layers. Here are the different methods for activating layers:
-
MO(n): Momentary Layer – Activates a specific layer only while the button is held down (e.g. MO(2) switches to Layer 2 until the button is released).
-
OSL(n): One Shot Layer – Activates a specific layer for one keystroke and then automatically returns to the original layer.
-
FN1: Function Layer – Denotes a function layer that provides access to additional functions or shortcuts when the Fn key is pressed.
-
Space FN(n): Can be used to change layers or perform other functions, depending on user settings.
-
TT(n): Toggle Layer – Switches to another layer and stays there until the same key is pressed again to switch back.
-
TG(n): Toggle Layer – Similar to TT , but with quick switching between layers without holding the key down.
-
TO(n): Tap to Layer – Tap once to switch to a specific layer, while holding the button keeps the current layer.
-
DF(n): Default Layer – Sets a default layer that the keyboard switches to on startup or reset.

Akko VIA keyboards
Akko VIA keyboards are specifically designed for use with the VIA configuration tool, allowing you to customize the keyboards to your needs. With Akko VIA keyboards, you can easily configure key bindings, lighting effects, and other features. VIA offers a user-friendly interface that allows you to easily create macros, manage layers, and even customize the RGB lighting.
5075B Plus VIA ISO Mechanical Keyboard
The 5075B Plus VIA ISO Mechanical Keyboard from Akko offers outstanding customizability and performance. With VIA compatibility, it allows for effortless key remapping and easy customization. ISO layout support makes it ideal for users in European regions. This keyboard combines comfort, ease of use, and a premium design, making it perfect for those who value both functionality and personalized design in their keyboard.

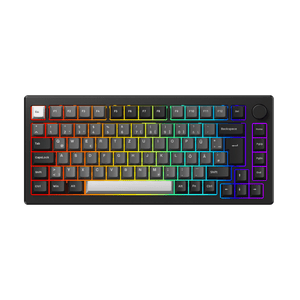
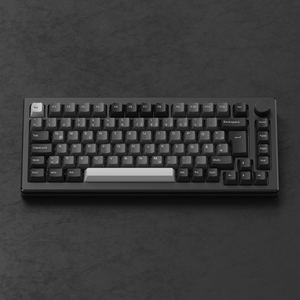
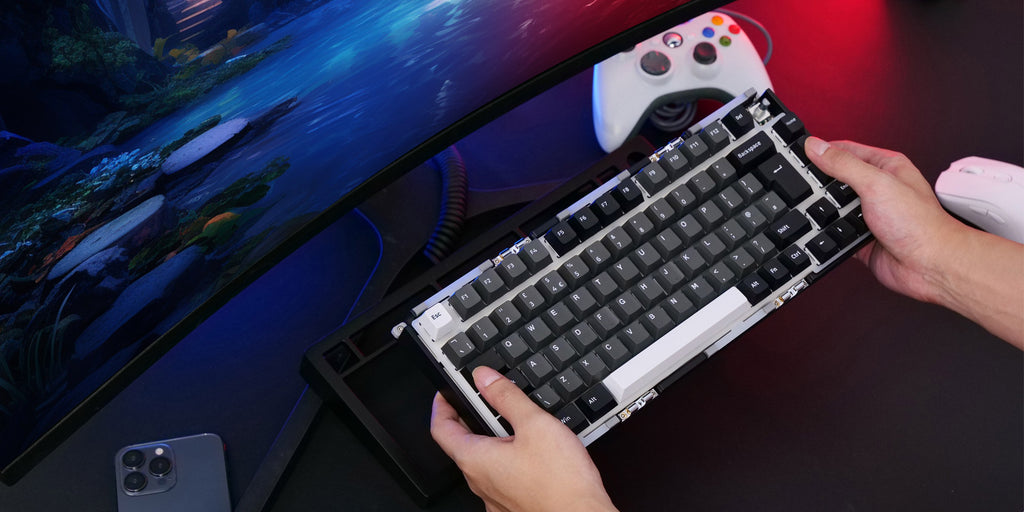
MonsGeek M1 V 5 Custom Mechanical Keyboard
The MonsGeek M1 V5 custom mechanical keyboard is our latest model, combining style and functionality for both beginners and advanced users. It features an innovative ball-catch design for quick disassembly, supports both ANSI and ISO layouts , and offers VIA compatibility for effortless key customization. Featuring a powerful 8000mAh battery , dual-mounted gaskets , and improved fiber optic switches, this keyboard delivers an exceptional typing feel and visual experience.
Yu01
The YU01 Resin Keyboard sounds like a beautiful and functional choice. Its retro aesthetic combined with VIA compatibility makes it perfect for anyone who loves to customize their setup. The premium resin material and transparent case add a unique, artistic touch, while its compact design keeps it practical for daily use. It definitely seems like a great option for those seeking both style and a tactile typing experience!